Friday, July 4, 2014

DIY Bookshelves!

Our new house has no bookshelves...what a travesty! I was sold on the old house because of the floor to ceiling built-in. In the new house we have a random room of the kitchen that I suppose could be a formal dining room but we have decided to turn into a study/library. First things first, we needed bookshelves. I needed to get those boxes full of books unpacked because it was driving me crazy. I scoured the internet looking for bookshelves. I knew I wanted them to surround our window in the spare room and they needed to be a certain height and width (which is difficult to do unless custom made). I also didn't want to spend a ton of money. I did find an idea on Pinterest to use IKEA Billy bookshelves. I thought this could work but it would still add up quickly, we'd still be constructing them ourselves, and we'd have to go to IKEA. I tried Target but getting the right size was too difficult. So we did what we normally do, and decided to build them ourselves. If we did it ourselves we knew we could get the look and size we wanted.

We first needed to paint the room as it would be difficult to paint after the shelving was up and the white walls were starting to nag at me. Color please!


It took about three hours to paint the whole room "Rainy Afternoon". I wanted something that looked relaxing and also had a "study" feel. I took the whiskey barrel in the room as my inspiration and wanted to make the rest of the room have an older/worn feel.
 
 
We then measured our walls, floor to ceiling, side wall to window, and determined the measurements for our shelves and sides. We decided we didn't want to go completely to the ceiling, which was 8ft as that would require us to build the bookshelves while in the room otherwise we wouldn't be able to sit them up, also we wanted to give the wood room to expand. We also left a few inches off between the window and the shelf.
 
We went to Home Depot (b/c it's closer) and looked at the framing wood. The framing wood was fine for our purposes because we wanted a beat up worn look. We wanted the depth of our shelves to be 10" so we picked wood already at that width. We were able to make the shelves out of cut 10ft boards, the sides out of cut 8ft boards and the tops and bottoms of the shelves out of a cut 16ft board. They were all 2 inch wide boards.
 
When picking your wood look for interesting pieces that have a lot of knots or indents; however be cautious of ones with cracks and that are out of whack. You want the boards to be as straight as possible with as little warping.
 
We had the worker at Home Depot cut the wood to the lengths we needed. It saves times and if you don't have the tools at home it helps. Also if you don't have a large vehicle to transport the lengths this is a good idea.
 
We cut the shelves to 38", the sides to 7' 10" (realized later this needed to be shorter, but we took care of it at home) and the top and bottom boards to 42".
We wanted two bookshelves so we had 6 shelves for each, a top and a bottom for each and two sides each.
 
We also picked up 3 1/2 inch wood screws, and 2 inches L brackets, stain, and screws for the L brackets. (more in-depth material list below).
 
 
Once home I pulled out the sawhorses and started beating the boards up with a hammer and then stained all the pieces. This was a pretty quick process. Just follow the directions on the can. We realized at this point that our side shelves needed to be two inches shorter because of the top and bottom pieces, so Kyle pulled out the miter saw and took off the excess.


Once everything was dry I laid out the bookshelves for an idea of how they would be constructed. We realized the shelves did not get cut at exactly the right length so we needed to take a little of the top and bottom pieces so we didn't have awkward gaps.
 
There was a little trial and error in putting these together, but we found the easiest way was to measure the side boards first and mark where the shelves should sit. We determined we wanted them to be roughly 15" apart. We only ended up needing five shelves for each bookshelf. Measure on both side boards. We then screwed the shelves into one side board using three screws a board.
 
Have a good heavy duty electric drill. We had difficulties because the darn thing kept dying and we had to wait for it to charge.
 
Flip your bookshelf over on the side board that the shelves are already screwed into. Your shelves will be pointing into the air. Put your second side board on top of that. Line it up with your measurements. Then screw that side of the shelves into that side board, once again with three screws each shelf. We then screwed on the bottom and top boards.
 
Sit the shelf up and make sure everything looks even. Use a level to check your shelves. You may need to do some adjusting.
 
To add extra stability we added in L brackets on the side of each shelf. Just screw them in.
 
If you don't get this all right on the first try, don't fret. We had a heck of a time with the first shelf, getting it all even and getting rid of gaps. The first time we sat it up our shelves were all really crooked. But once we did get it all figured out, the second one went much quicker.
 
Once it was together, we had to man-handle that thing into the house. What a workout!
 
We got it into the room and had to lay it on its front and then lift it into the spot, otherwise we hit the ceiling. Once in we used 4 L brackets and screwed it into the wall, specifically into studs. If you don't it want be stable or safe.
 
I noticed once we had the shelves up I had missed a little staining on the sides, so I'll have to do some touching up.
 
 
Eventually I'd like to add a window seat in between and maybe an additional shelf above the window. All of this cost us under $150; that's both bookshelves. Good luck finding that deal anywhere else, or the pride of knowing you did it yourself!
 
Materials
 
Framing wood
        -Decide your measurements to determine the best lengths. Boards 10 inches deep and 2 wide is good for a bookshelf.
Wood screws
       - 3 1/2" #10x to screw all the wood pieces together
       - 3/4" #6 wood screws to put L brackets on shelf
       - 1 1/4" #6 wood screws to screw L brackets into studs
Stud Finder
L Brackets/corner braces
You can use a countersink if you choose. We left this step out.
Stain or Paint
Lambswool cloth or brush for stain or paintbrush/roller for paint
Hammer if you want a rough look
Electric Drill
Level
 

Sunday, June 15, 2014

Repurposed Canvas Art on a Budget

We have a new house which means time for new projects!

A shower curtain at a local store caught my attention the other day. I wanted to get a new curtain for the spare bathroom and when it caught my eye I figured it would be a good idea to go ahead and get it. When I got home and took it out of the package I realized I liked the print so much I couldn't put it in the spare bathroom where I wouldn't see it much. The feel of the fabric reminded me of canvas and I got an idea. Why not make it a picture for the large wall in the entryway?

 
The first step was making a canvas frame. Kyle and I took a trip to the lumber yard to pick up wood to make the canvas frame. We were able to get 8ft lengths of board for slightly over $1 each. We got four pieces. (Make sure they are straight all the way down or your frame will be warped).
The curtain is  6ft x 6ft. I decided I would need to make the frame 5ft 9in, giving me room to pull the fabric and yet keeping the full picture visible.
I finally got to use the miter saw!
Kyle assisted me in making the frame. We mitered the pieces to the right length, then used wood glue and screws to put them together.


I let the frame dry over night. I ironed the curtain to get the wrinkles out. I then laid the curtain out on the floor and laid my frame on top. I used a hand held staple gun to staple my fabric to the frame. Start at the top of the frame and fold over your fabric. I based it off the hemline so I knew I would be consistent when I went across. Put your first staple at the middle of the top of the frame, then go to the bottom of the frame and stretch your fabric and put a staple in the bottom center. Then do the same on either side. Keep doing this working out from the center of each side and rotating back and forth to ensure you get the fabric pulled taut.


Fold in your corners and staple those. If I had any extra fabric I just folded it around the wood.
The canvas was light enough I could hang it up with nails. For approximately $25 we now have a large 5'9" x 5'9" piece of "artwork" in the foyer.


 My only caution is if you use a light colored fabric make sure that if your wood has any writing on it that you paint over it with white or find a way to hide it or it may show through your fabric.


Wednesday, October 2, 2013

Scrapbook Headboard

Okay, I know it's not totally original and you can find a million different ways to do a headboard on Pinterest, but I've been trying to decide how I wanted to go about making an inexpensive one to change up our room. Initially I was going to cover plywood or foam board in fabric. But like many of my plans, that changed.

 
I found foam board when I was at the dollar store, for you guessed it, $1 a piece. I bought six because I wasn't sure how big it would need to be and I bought it on a whim. When I was at Joann's I looked at fabric and decided it would be a little more expensive and I'd have to wait in the cutting line. So I explored the scrapbook paper aisle and found some really pretty paper (plus it was on sale 3 for 99 cents). I bought 40 pieces of paper (5 each of 8 different patterns).

I held the foam board above my bed when I got home and realized I'd only need four of the foam board pieces. I taped the four pieces together. I then tried different methods of gluing the pieces on.

First, I tried mod podge. This was my first time really using this so I didn't know what to expect. I learned it's not that great for bigger pieces of paper. They got too wet and had air bubbles when they dried, plus it made the foam board curl.

I had to pull off, and waste, two pieces of paper and try again; luckily I had more paper than I needed.

Second, I tried spray adhesive. This worked well enough but it was messy because of overspray and I needed to use it outdoors and seeing that I was working on this at 10 p.m. I didn't really want to keep running out in the dark. Also, the spray adhesive didn't allow me to position the papers easily.

I finally settled on the old tried and true glue stick. I know this doesn't always hold permanently so I may have to go back and fix it occasionally but it worked the best for what I had because it didn't curl the foam board and didn't leave air bubbles. I could also reposition the paper when I needed to. (It came in handy later because I could pull the paper off a little to hide the nails to hang up the board).

I glued down all of my pieces. I had to use an exacto knife to trim off a little of the side of the board because the paper didn't go right to the side. I used a black paint marker to paint the sides of the white foam board.

I hung the board up on my wall by using several small nails. The board isn't very heavy so you don't have to go crazy, but I wanted to make sure to secure each individual foam board so they didn't decide to let gravity take over.

Overall, I'm personally pretty pleased with the results. (Just wish my phone was taking better pictures). Of course, I'll have to see how it holds up.

Saturday, September 28, 2013

Think Outside the Box-Crafty Area Rug


 I have been looking for an area rug for my living room for several months. I've found many I like, however, I'm not willing to part with $400 for an 8x10. Not to mention the rug gripper I'd need to add to it.

I have been trying to think outside the box and get crafty. Of course I did a pinterest search. I initially thought I'd refurbish an old rug I have rolled in the closet. Once I rolled it out I realized it was a lot smaller than I remembered (probably only a 5x7). Then I thought I'd find some rubber or a rug pad with more stability and add fabric. I wasn't sold on this because I didn't think it would be very comfortable to lay on.

I found a pin where someone had made a tall twin bed out of stacked pieces of foam covered in fabric. It could be used as seating or pulled down as individual beds for sleepovers. I thought, why can't I do this for my rug. I could do 4x4 foam pieces with a 1/2 inch thickness. I could cover the foam with fabric and use spray adhesive, then they could either be stacked in the corner or laid out. Or you could pull one out to sit on. I went to Joann's today and found out that foam is really pricey! $11 for a yard! And I needed about 9-12 yards. $120+ just for the foam wasn't going to cut it for this project, especially since I didn't know how it would work out.

I wandered around Joann's but couldn't come up with anything that was in my budget. I left and took a trip to Walmart and wandered. Then I found this:


And it's not a rug from Walmart, because I couldn't even find something reasonable there that matched my decor. I actually found this in the bathroom decor aisle. It's comprised of 4 extra large/thick bath towels. I wasn't going to purchase them because I thought that's crazy; towels on my floor. But the more I thought about it I realized you see rugs made from all sorts of materials and really with the pattern and thickness of these it wasn't much different than rugs I've seen. I bought four at $13 a piece and when I got home I sewed them together. (Probably a 30 minute project, even though I still need to do a little hand sewing around the edge).
 
Not only was it in my budget but think how easy it will be to clean! Plus it's easy to move around and store if I want a break. Hopefully no one else will realize it's made from towels; except for all of you that I just told.
 Just think outside the box.

Sunday, August 25, 2013

Tybee Dresser

For the last couple of years we have had a dresser sitting in our garage; the sister of a dresser I already refinished. I figured it was time to do something with it or get rid of it. So over the last couple of weekends I refinished it.

My inspiration was an older, weather-worn house on Tybee Island. As well as the wrought iron in Savannah.

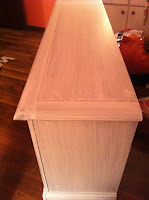
Following my inspiration I white-washed the dresser and used handles and pulls that had a wrought iron look. This is the dresser before (minus the drawers):


I stripped off the old stain. I first tried to use an orange stripping agent called Citrusstrip. It did not work well. While it is great that it stays wet for a long time, it came off in wet, tarry, clumps and clung to the dresser. I spent a lot of time just getting the stripper agent off the dresser after I had already stripped the stain. After that fiasco, I used Jasco Paint and Epoxy Remover to clean up some left-over stain. It cleans up much better than the Citrusstrip.

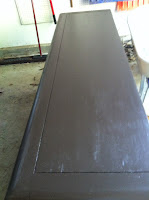
I decided to first paint the dresser and drawers a dark brown paint I had left over from another project because I didn't want the light brown wood to show through the white-wash. I wanted a darker look. However, you could start white-washing right after taking off the old stain if you wanted.


After the brown was good and dry I mixed up my white-wash. I used some leftover white latex primer. I filled a solo cup half full with the white paint and then added in water to get a consistency I liked. I was able to do two coats on the dresser with only that small amount of paint. It is super runny so make sure you are working somewhere you don't mind getting messy. Follow the wood grain and make sure to get in any nooks. If you get water spots just go over with another coat later.

 I decided to save some money and use the old hardware. I bought a can of Rustoleum's Hammered look in black and painted the hardware. With two coats of white-wash and spray paint this is what I got:


Monday, July 22, 2013

"Homemade" Grease Stain Remover

I have a green New York and Company shirt made primarily of polyester. It's the type of shirt that shows every water spot and everything else. I thought I had done it in the other day as I got a grease stain right down the front. Go figure!

I washed it and it didn't come out so I figured I'd do a search online for a stain remover and if it didn't work, consider that the shirt had a good run. My online stain remover worked! I will file that one away for future use. Here's the trick:

A mixture of liquid dish detergent (Dawn) and baking soda. Use enough soap to make a paste and then put it on you garment (I don't know if it works for non-polyester garments), scrub it in with your nail. Let it sit for at least 10 minutes. Wash like normal.

Stain magically gone!

Saturday, July 13, 2013

Installing a Screen Door


So I can't take much credit on this one because I didn't do much but help carry and open the box and lift the door into the frame.

My wonderful husband installed this screen door today and now we can have natural light and a breeze through the foyer.

If you are at least a little handy with powertools this isn't a bad project. The directions that came with the door were clear with a lot of pictures. (Larson is the manufacturer).
It may have helped that our front door and frame are pretty new so everything was nice and square.

We had most tools on hand. (electric drill, drill bits, pencil, tape). We only had to get a larger drill bit to help with the door handle installation. One great thing about this door is that you can install the hinges and door handles on whichever side you need.

This project can probably be completed in about half a day and you can enjoy more light and fresh air right away.